

Free Custom Trading BotFree DCA Trading BotFree Grid Trading BotWebhook BotFree Copy Trading BotFree Smart Money BotFree CRT Trading BotFree AI Trading AgentTrading TerminalAI CoachNotificationsBacktest
Centralized (CEX)
Decentralized (DEX)
Getting Started
Quick Start Guide
Updated March 11, 2026
Get your first trading bot running in under 5 minutes. This guide walks you through the entire process from signup to your first live trade.
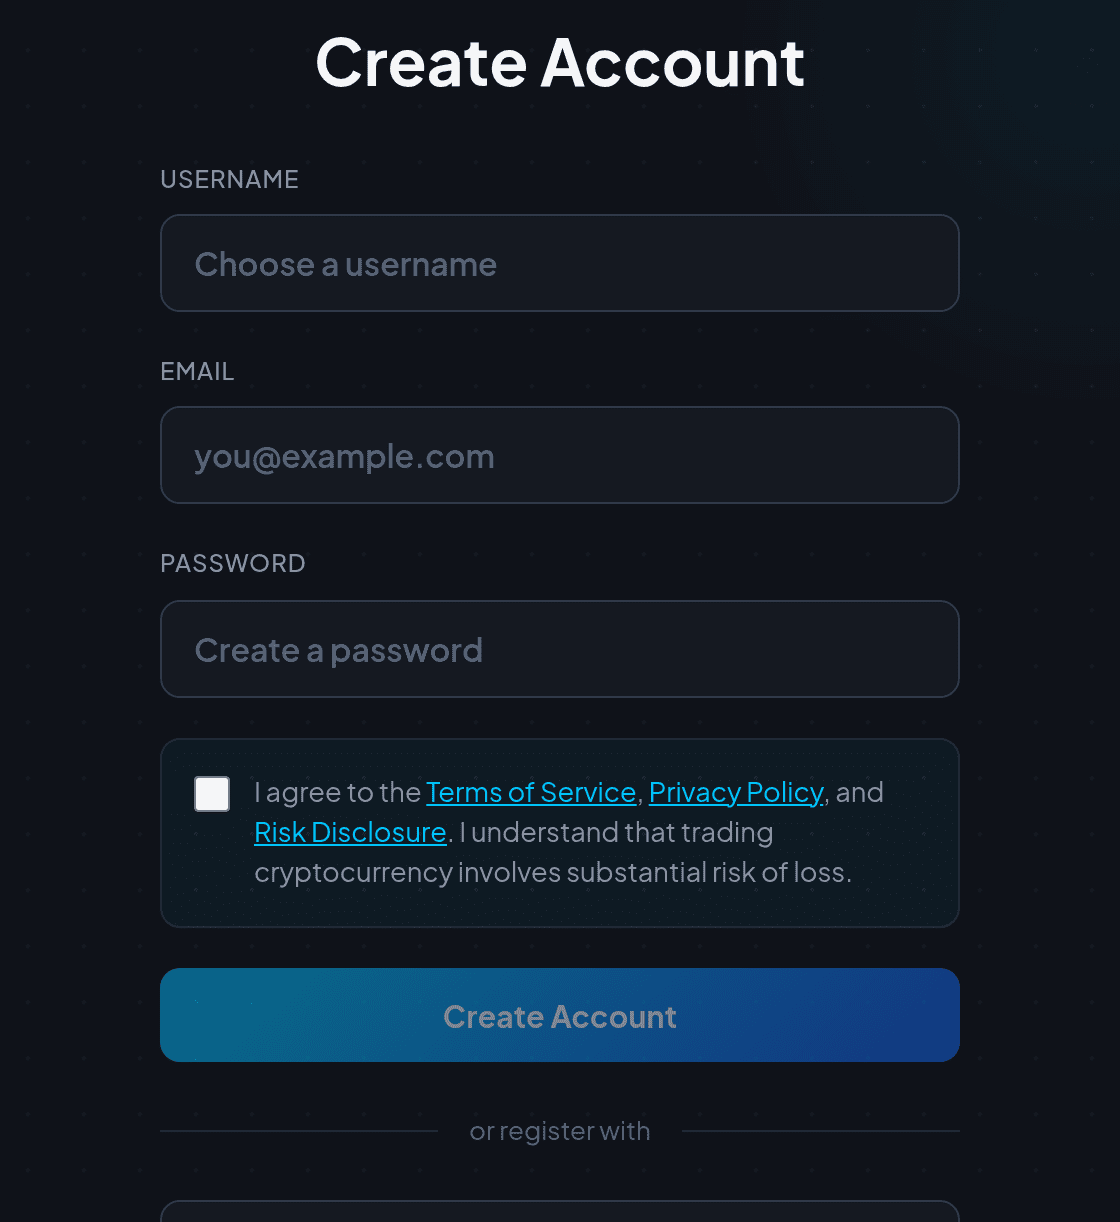
Step 1: Create Your Account
- Go to /register and enter your name, email, and a strong password.
- If someone referred you, enter their referral code during signup.
- Verify your email address to unlock all features.
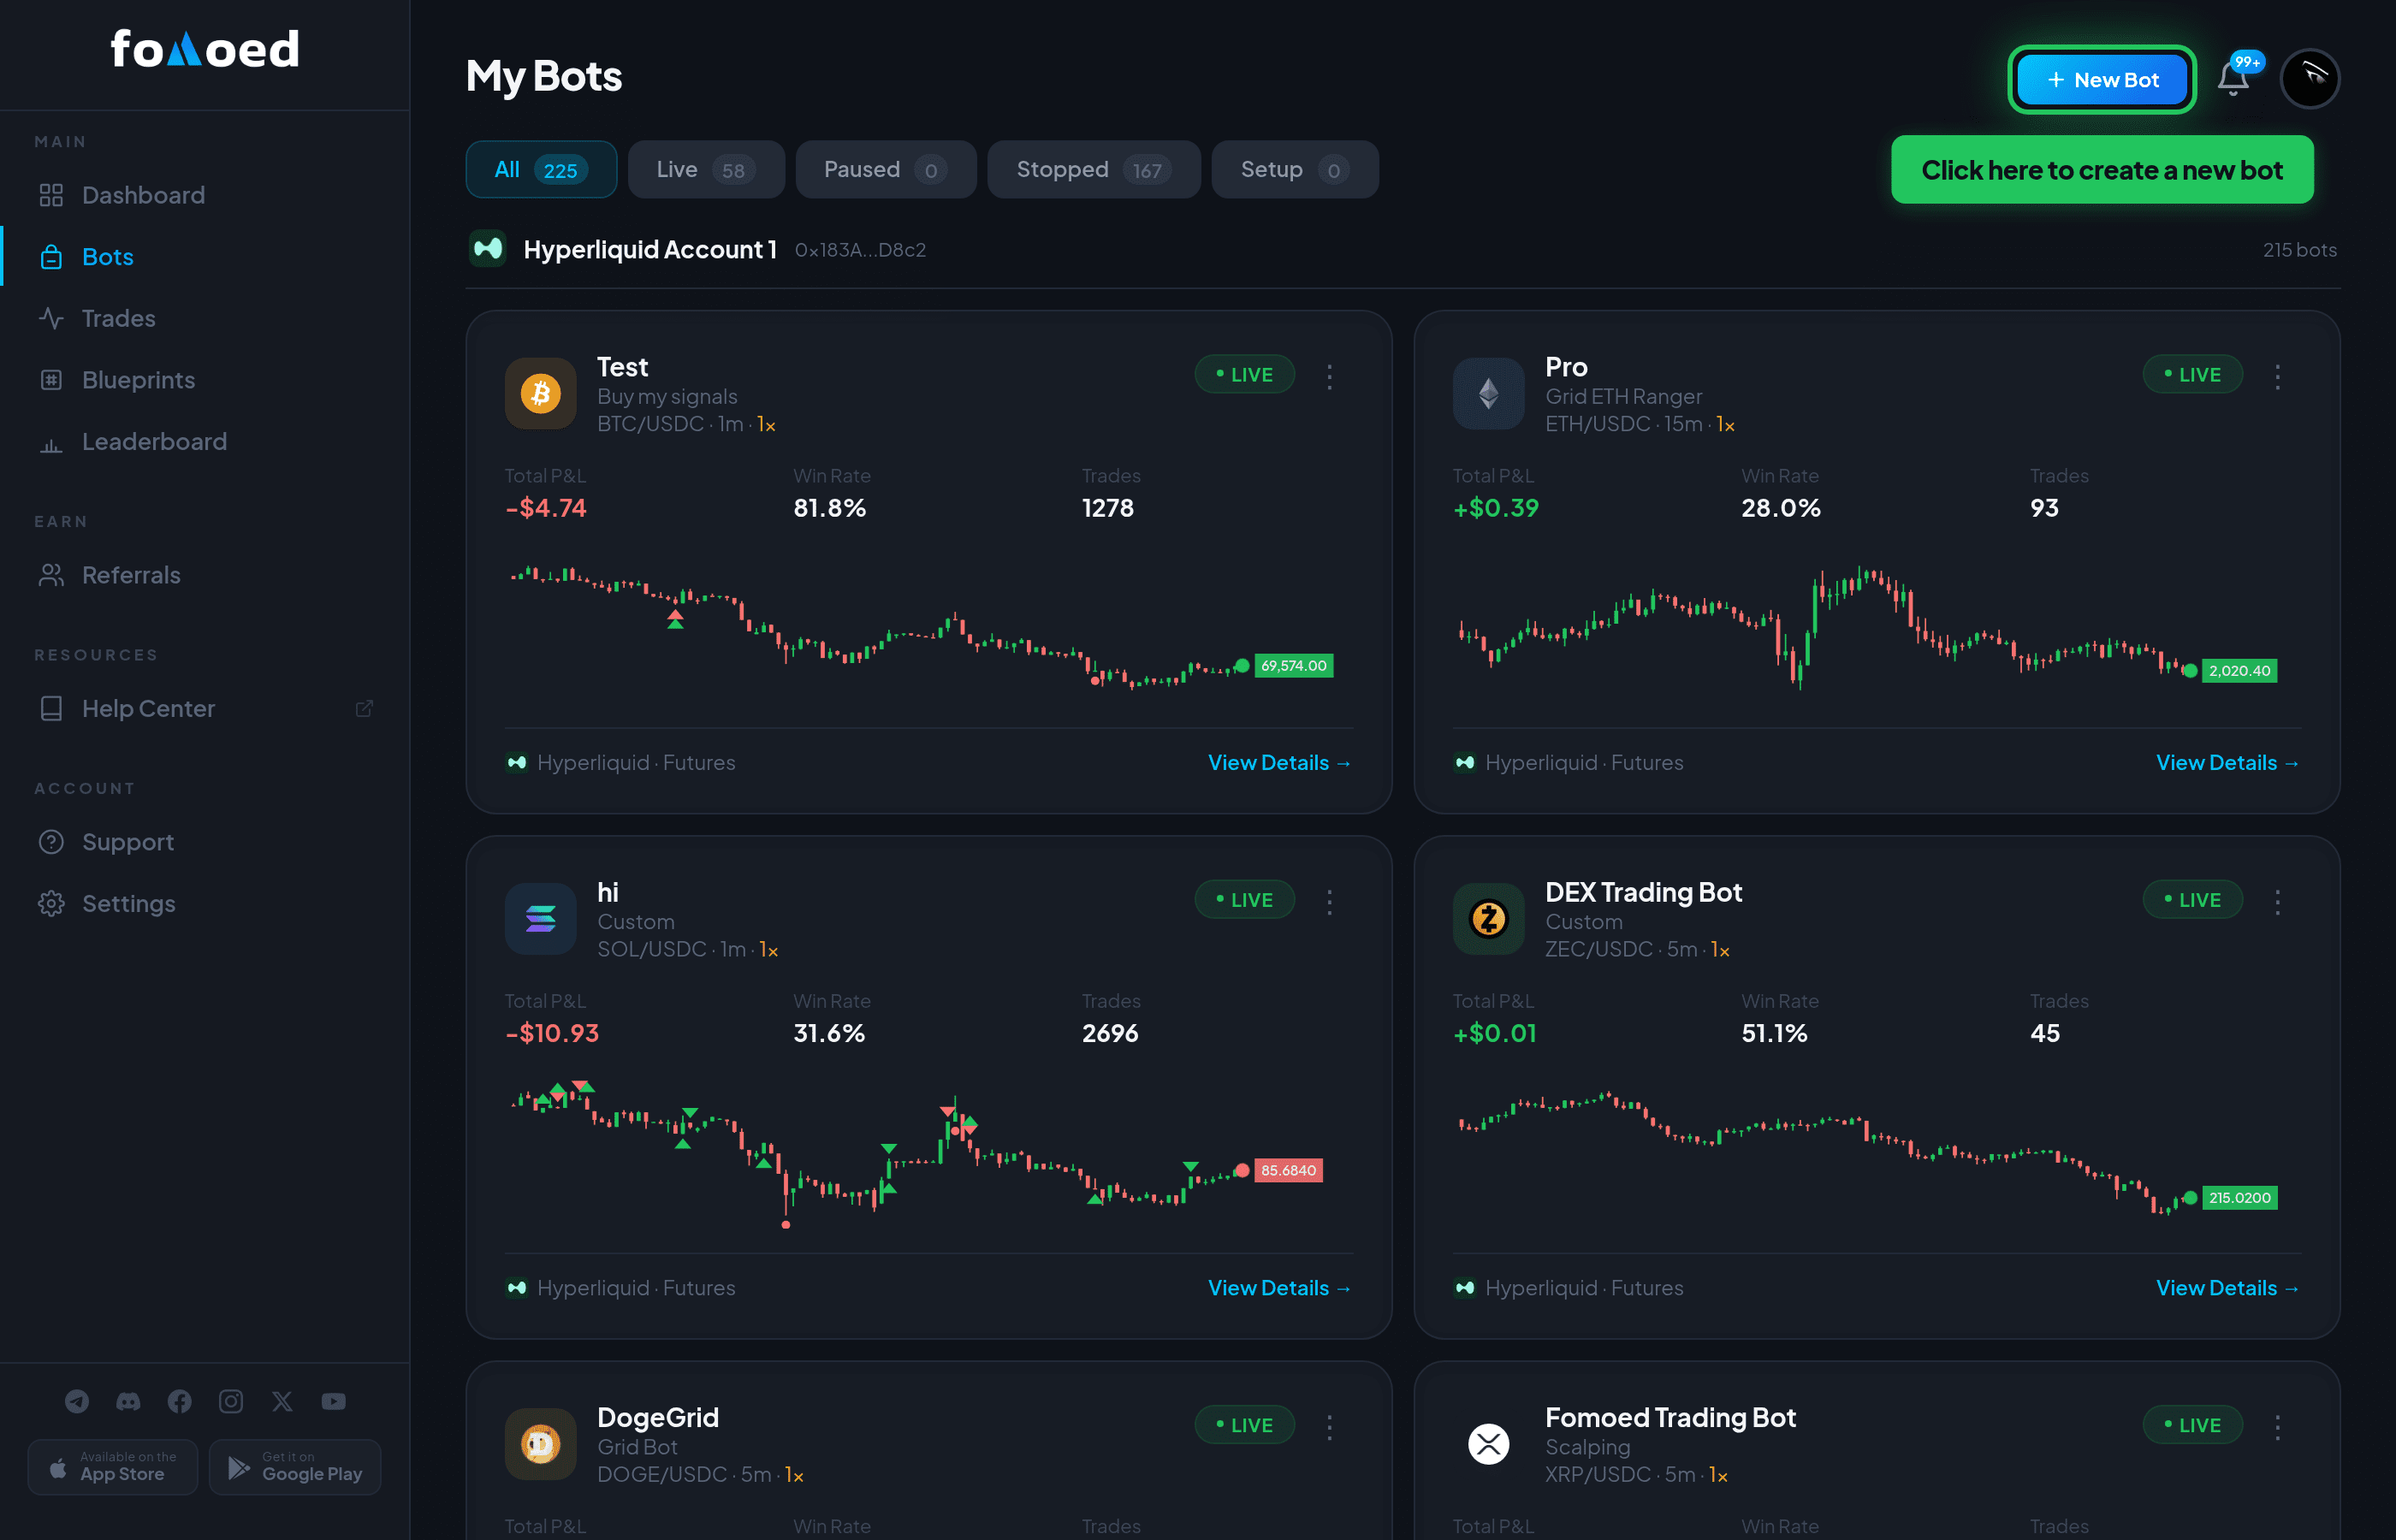
Step 2: Create a Bot
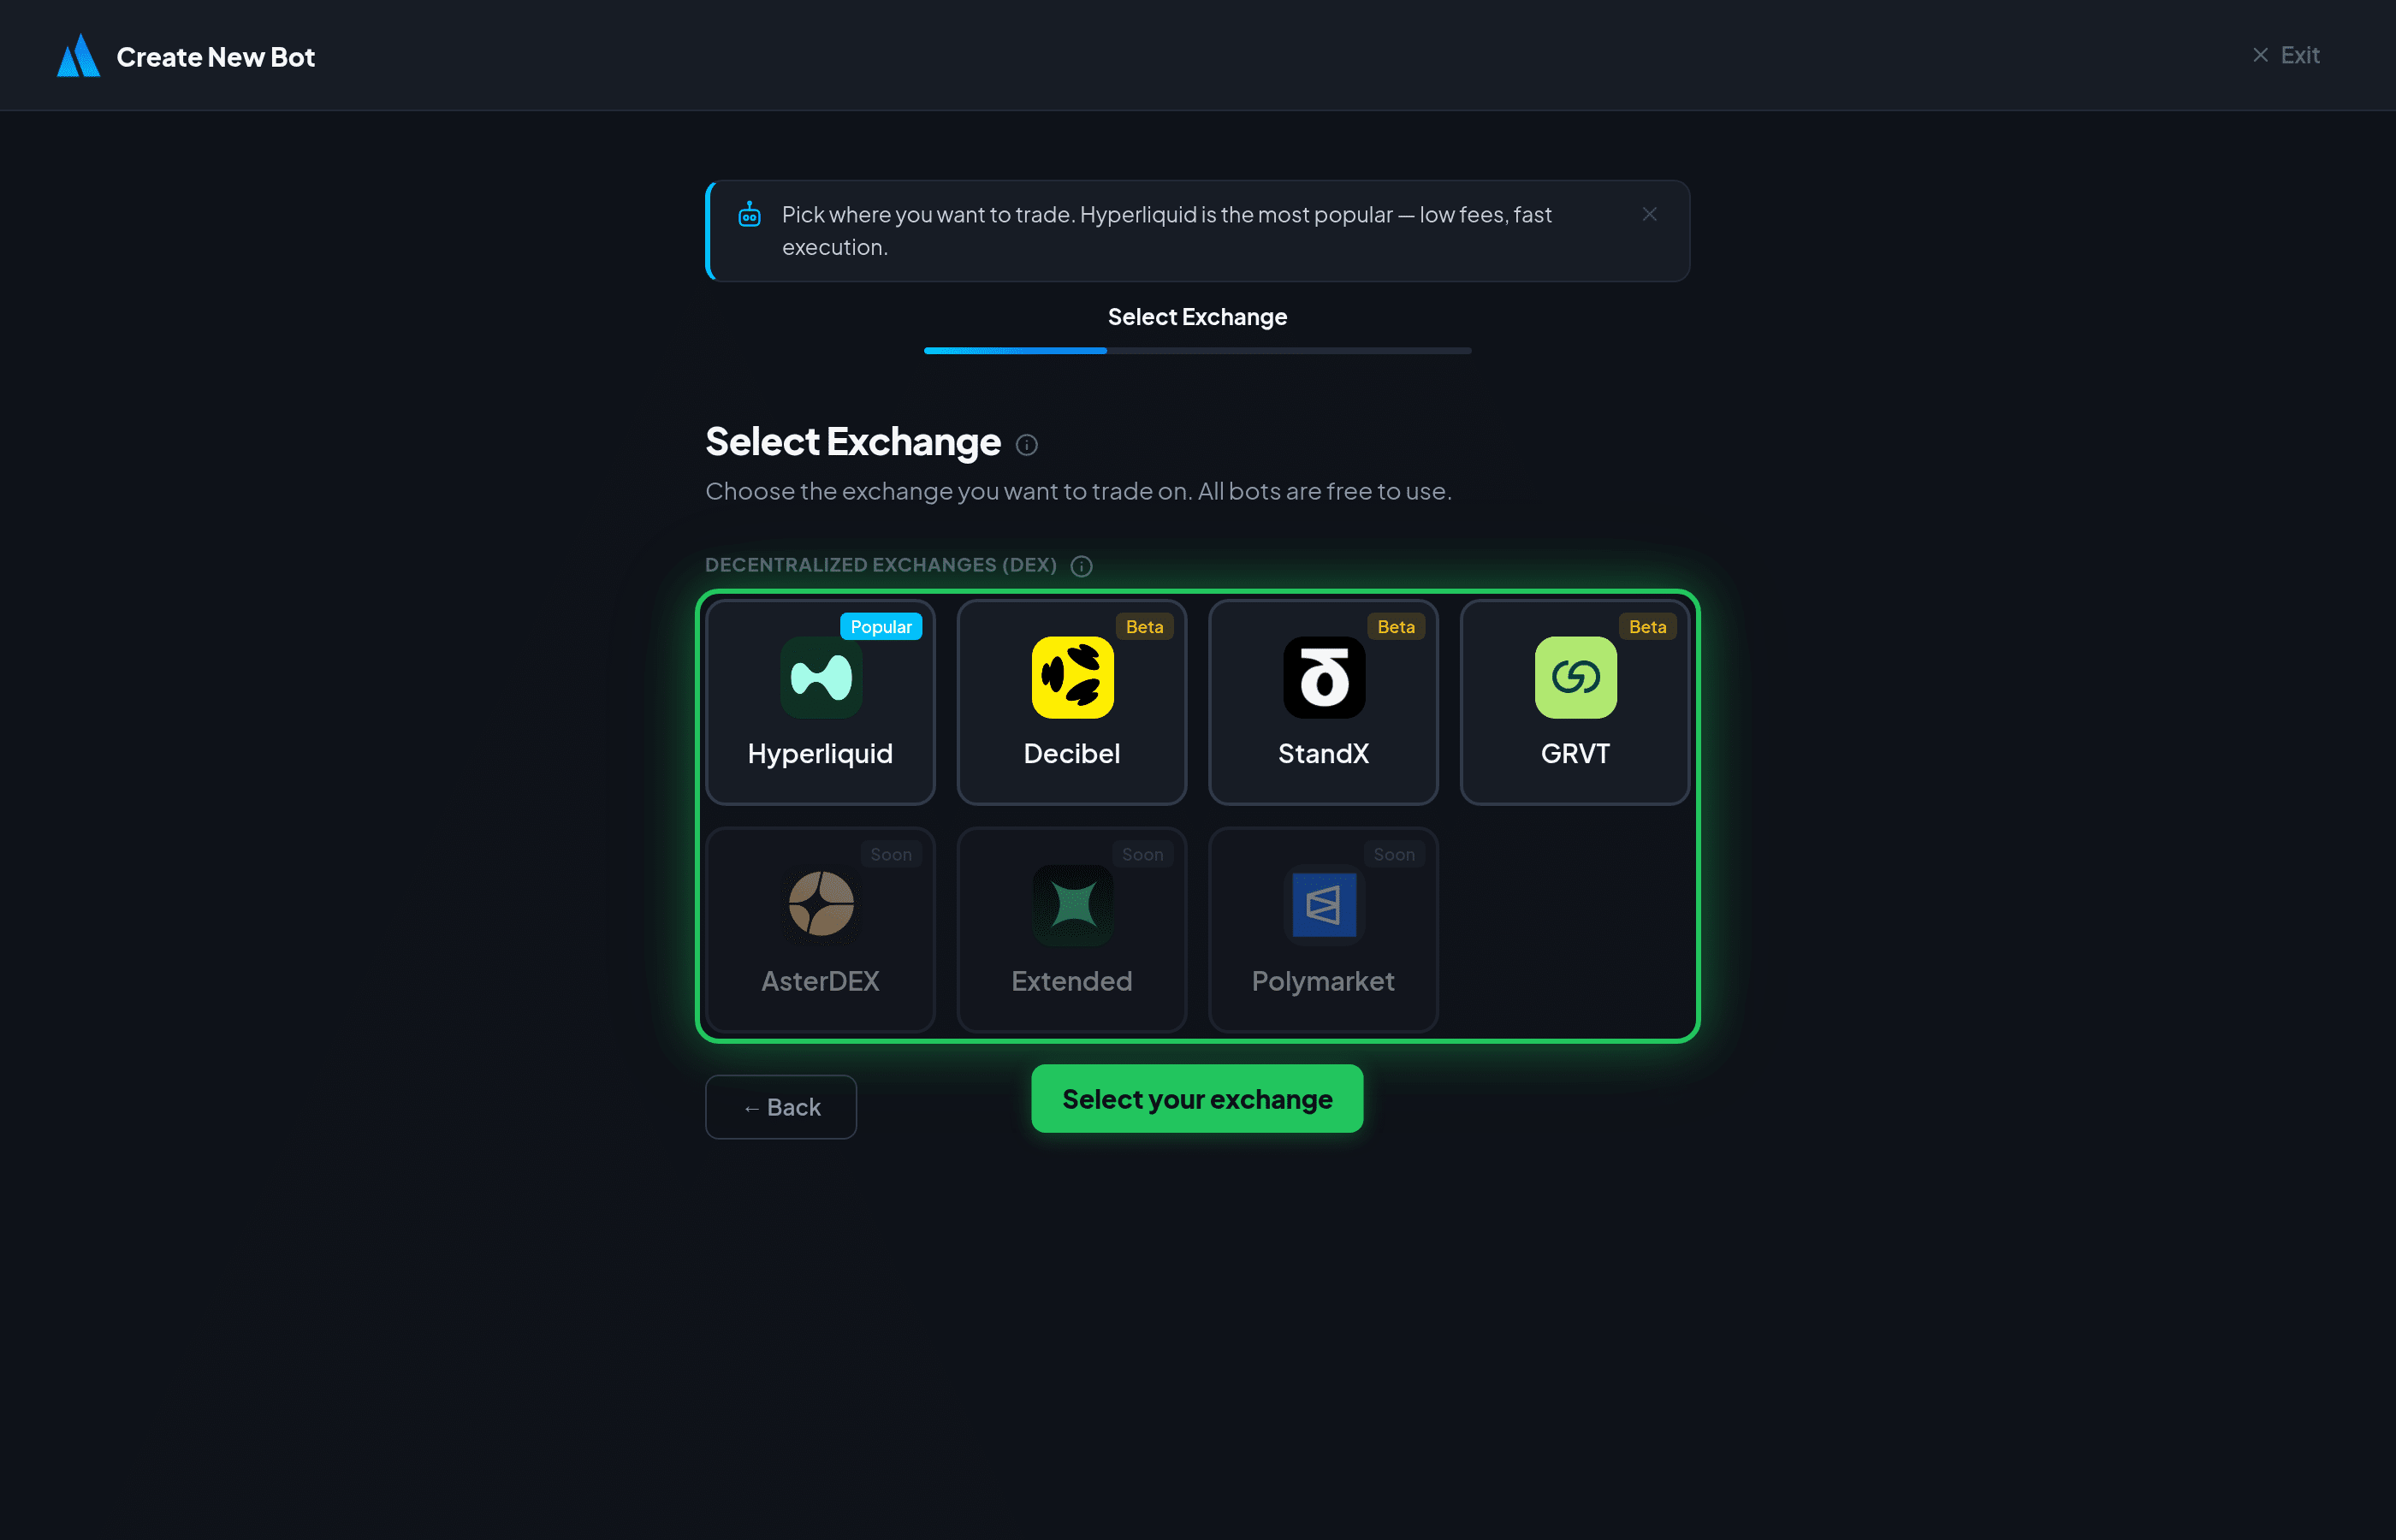
- From your Dashboard, click "Create Bot".
- Choose your exchange — all exchanges are free to use.
- Give your bot a name to help you identify it.
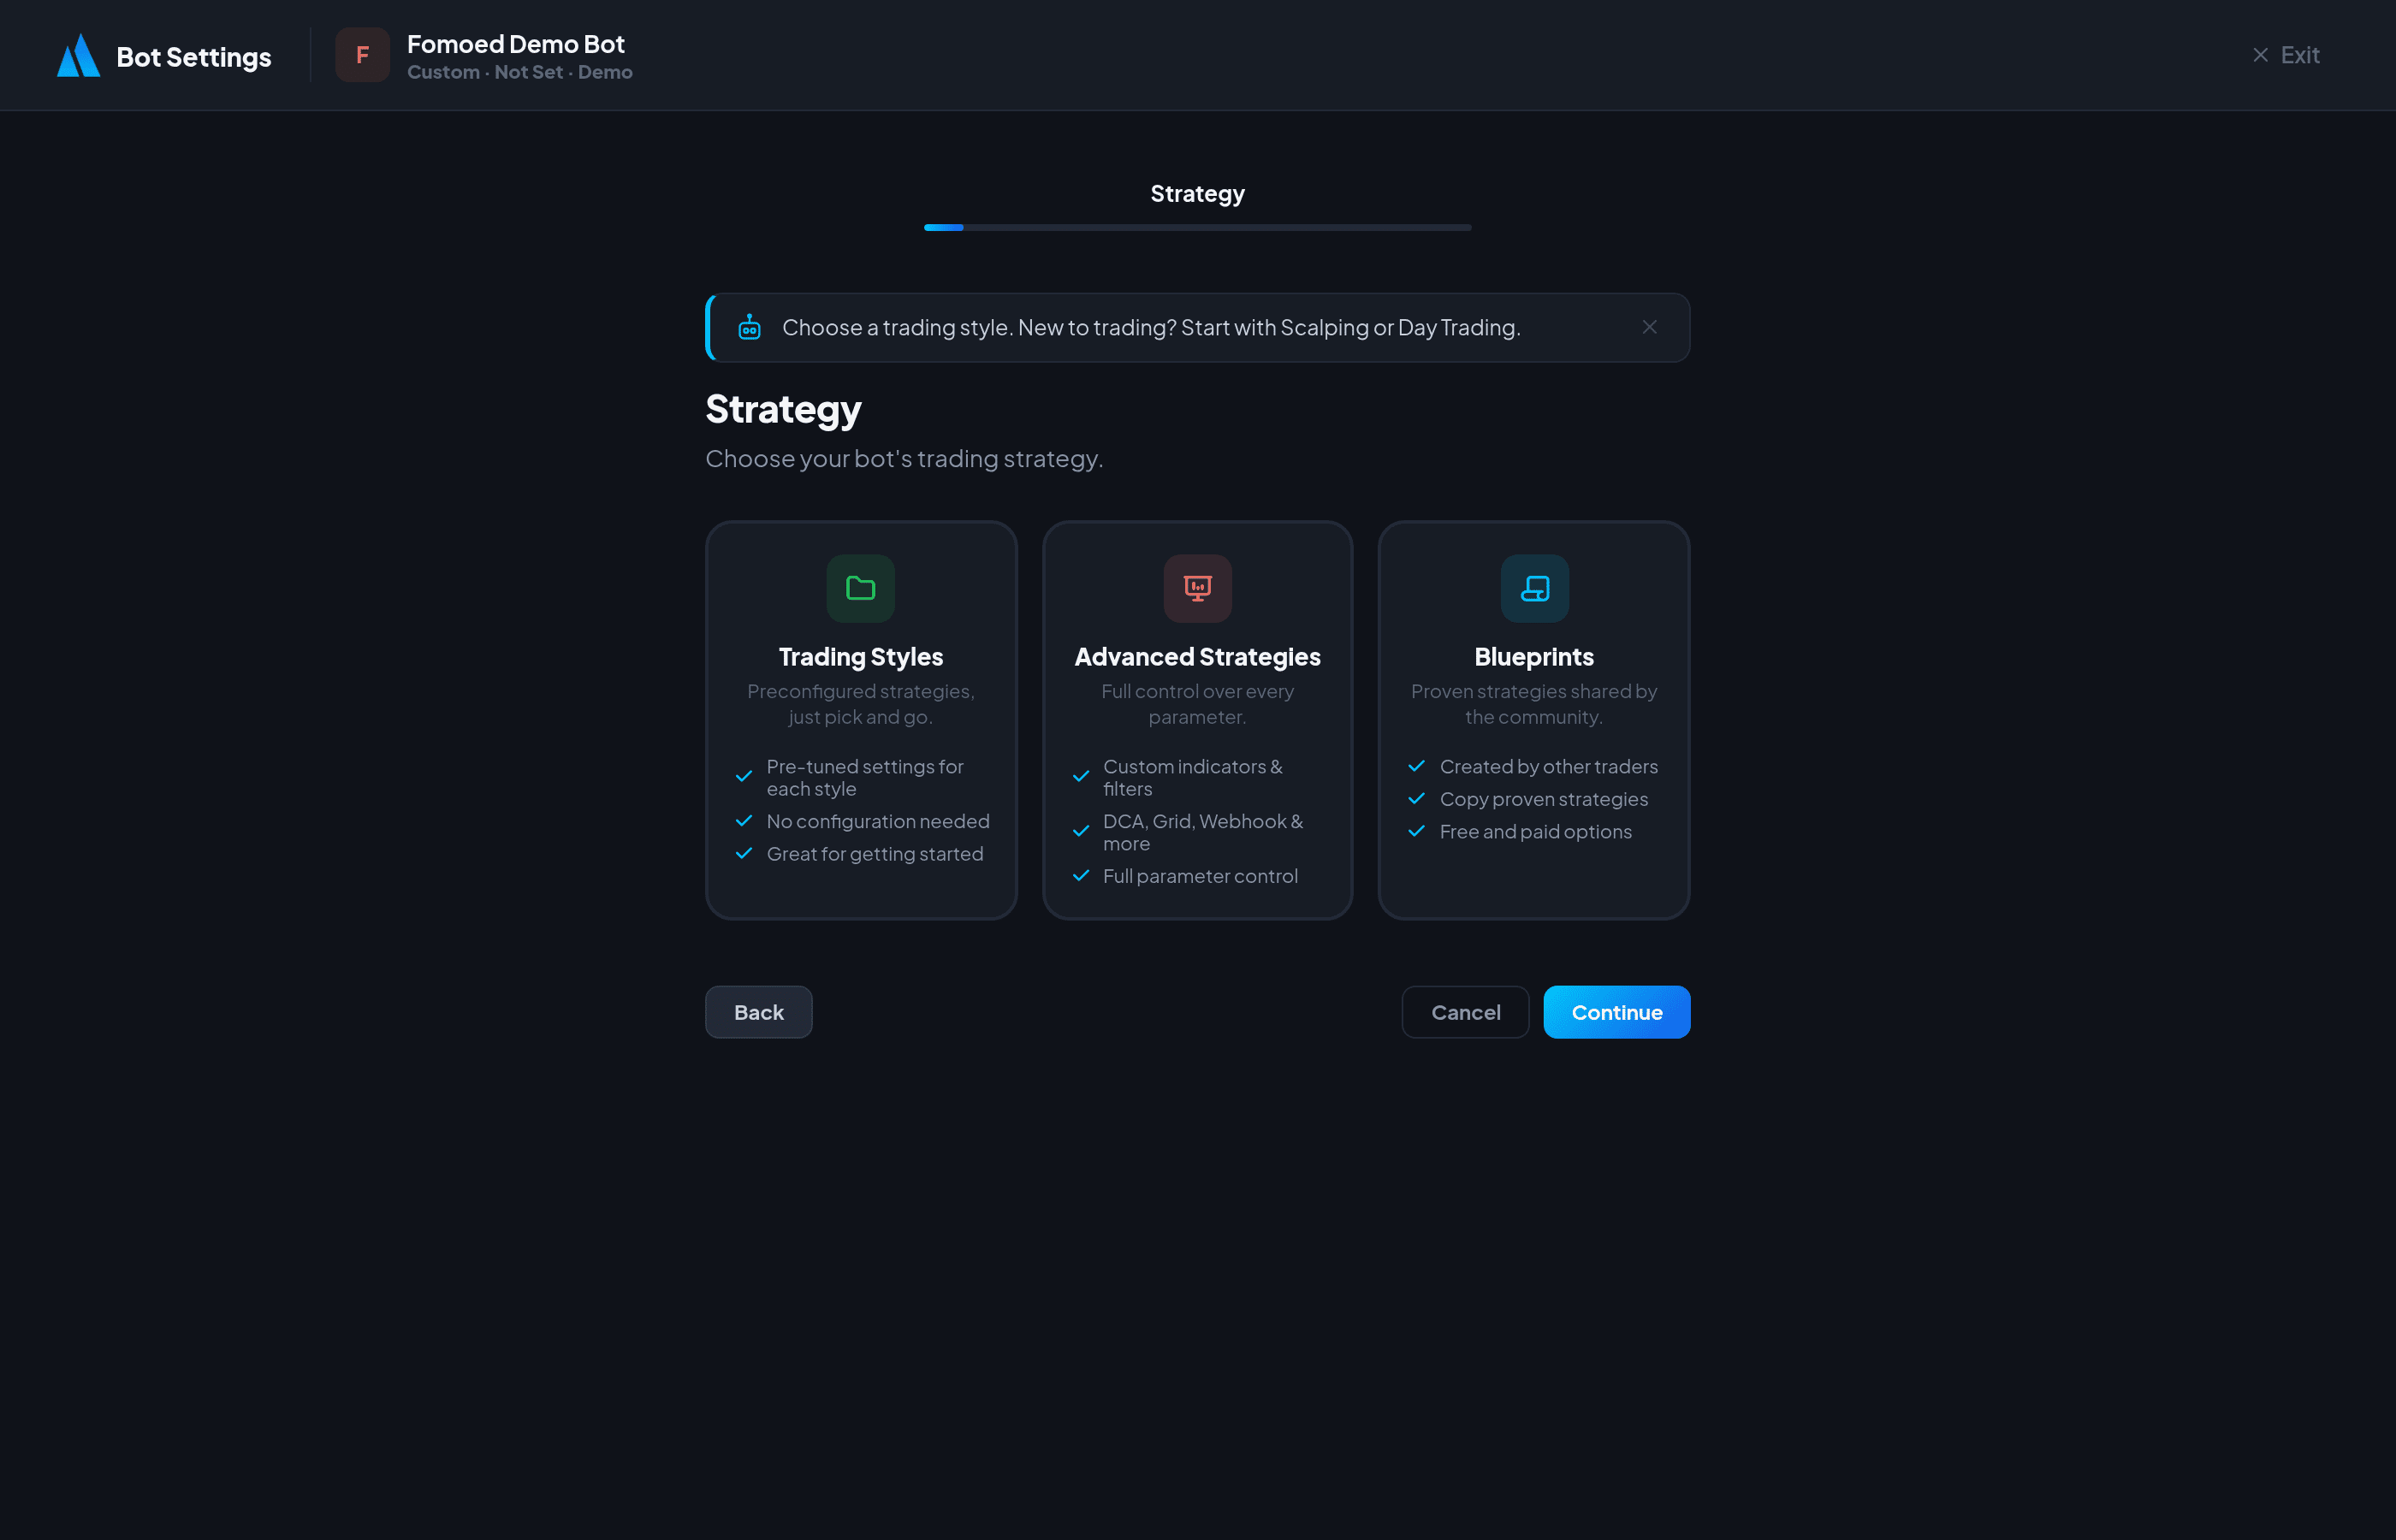
Step 3: Configure Settings
The bot setup wizard guides you through configuration steps:
- Exchange — Enter your exchange API credentials (wallet address, API key, or API key + secret depending on exchange).
- Strategy — Pick a preset (Scalping, Day Trading, Swing) or an advanced strategy (Custom, DCA, Grid, Webhook, Copy, AI).
- Market — Choose Futures (perpetual contracts) or Spot trading.
- Entry Mode — Confirmed (waits for signal confirmation) or Aggressive (enters immediately).
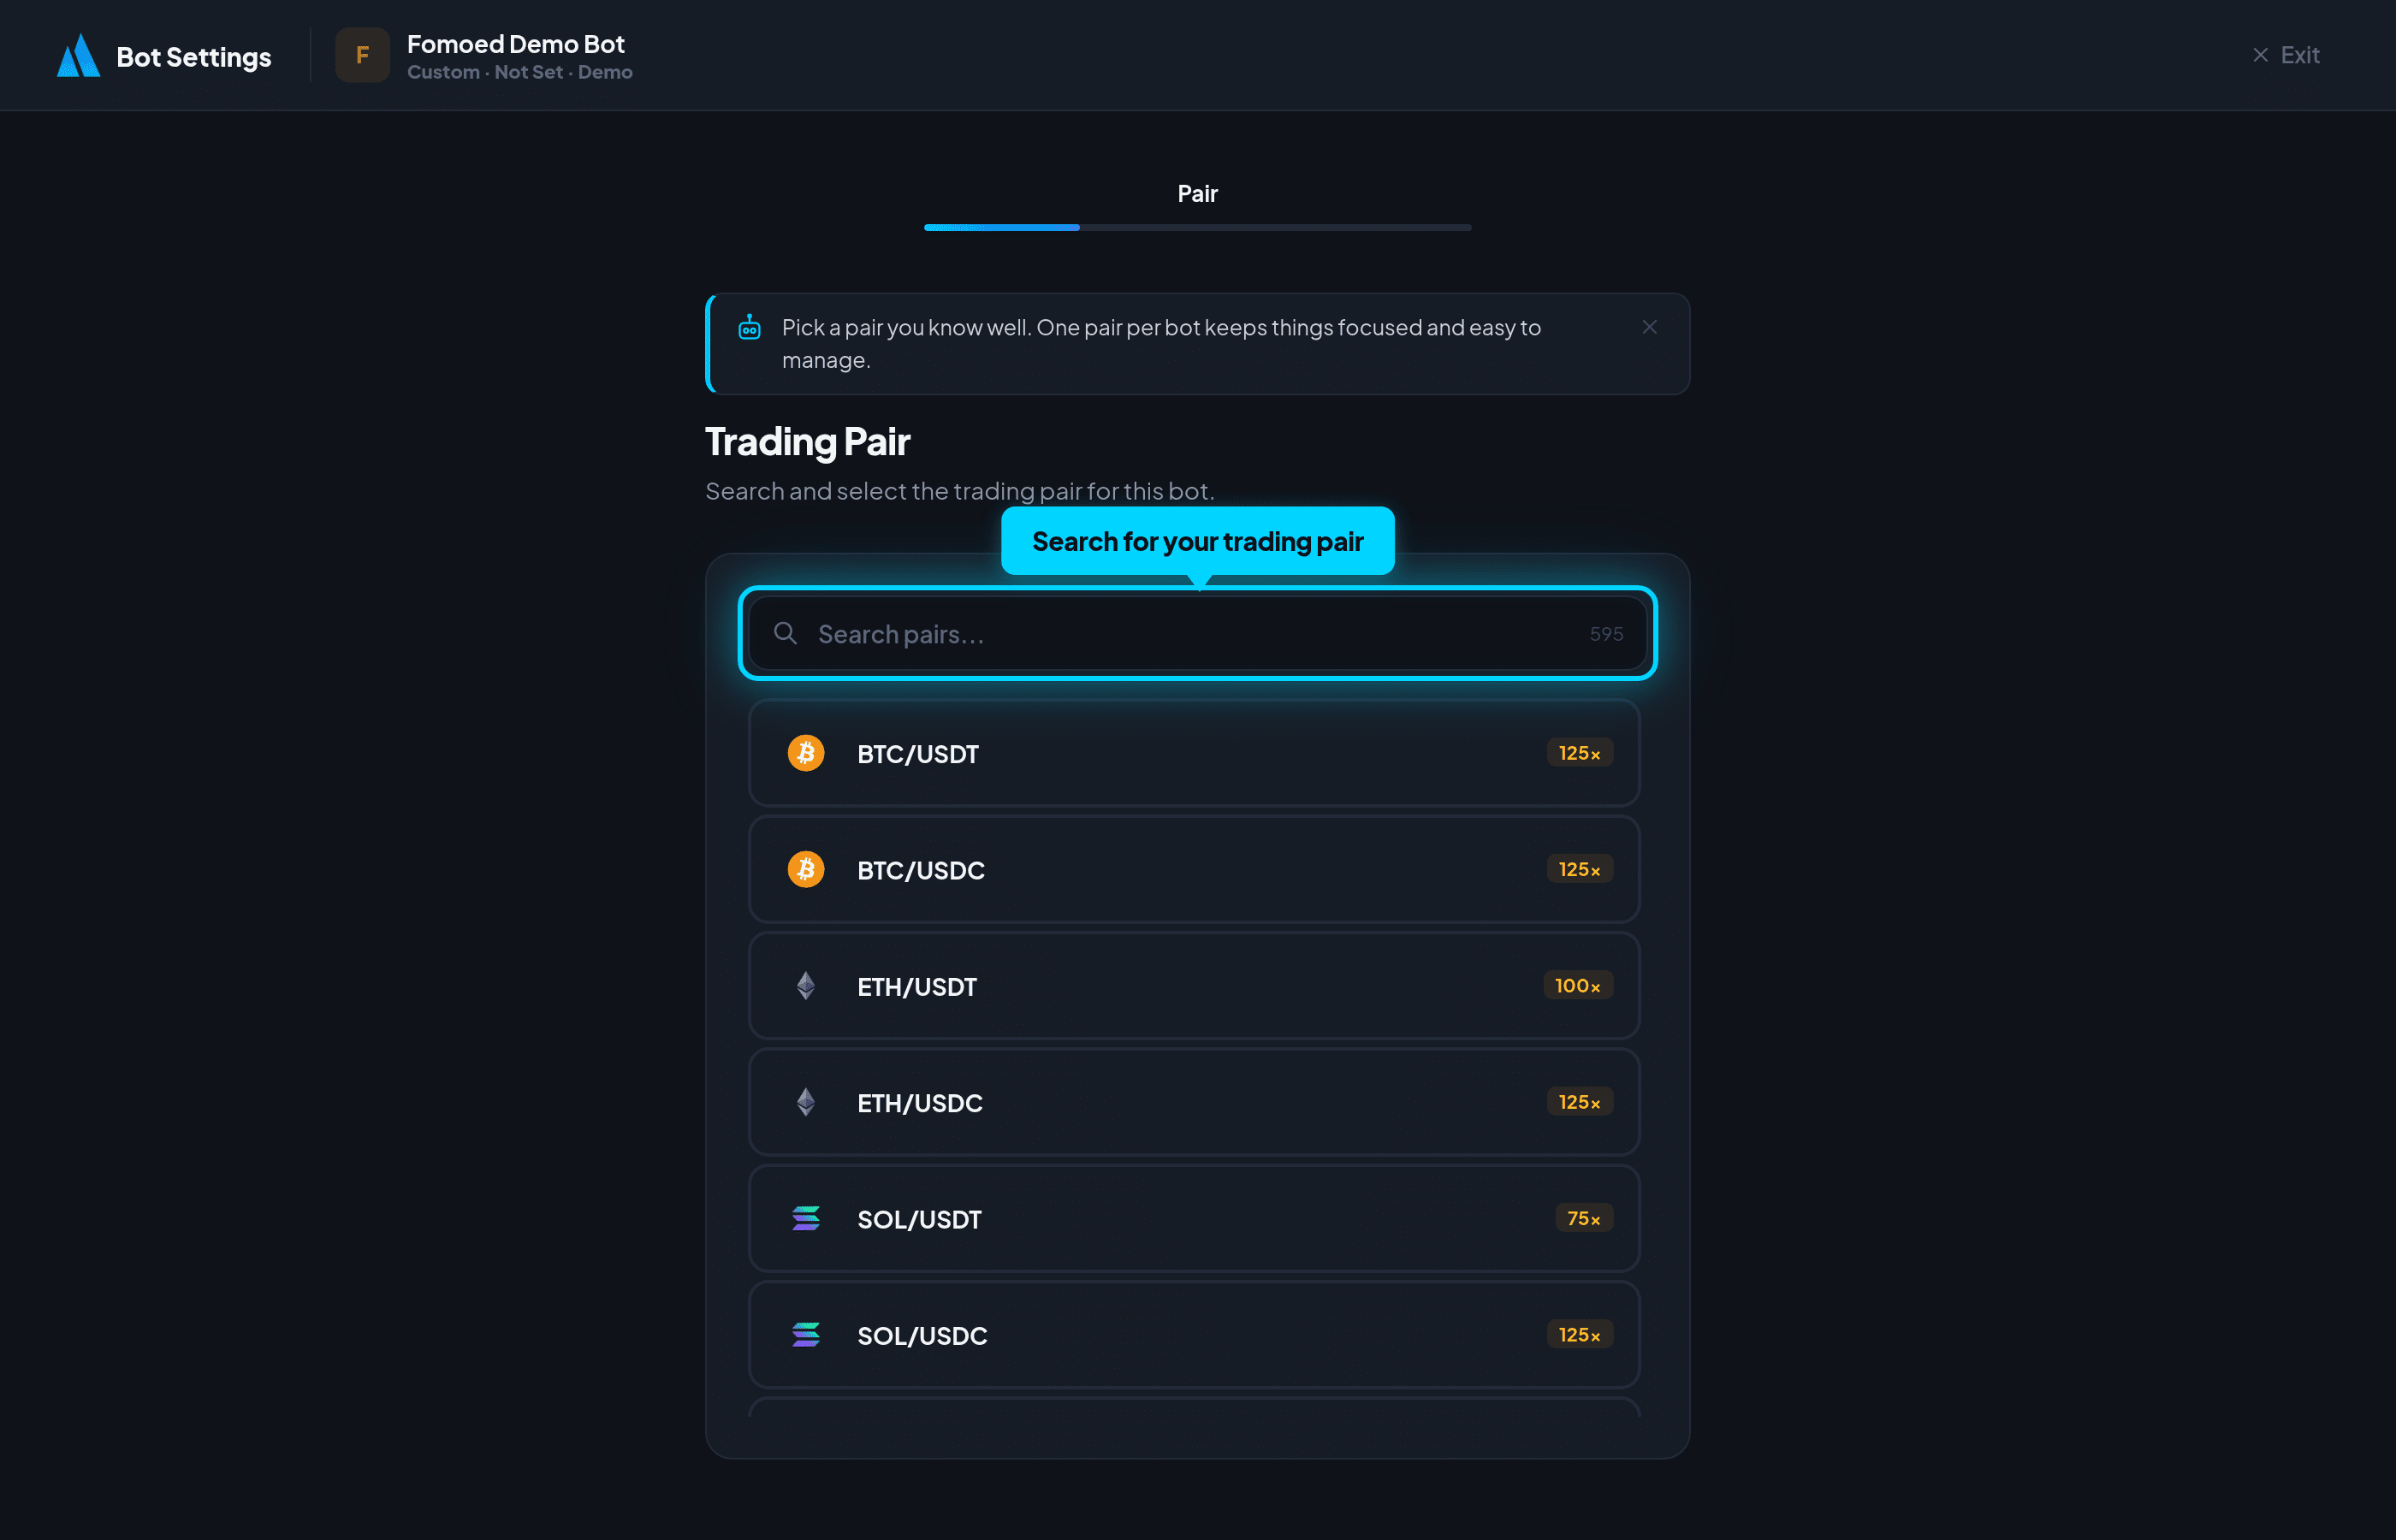
- Trading Pair — Search and select your pair (e.g., BTC/USDT), set position size and leverage.
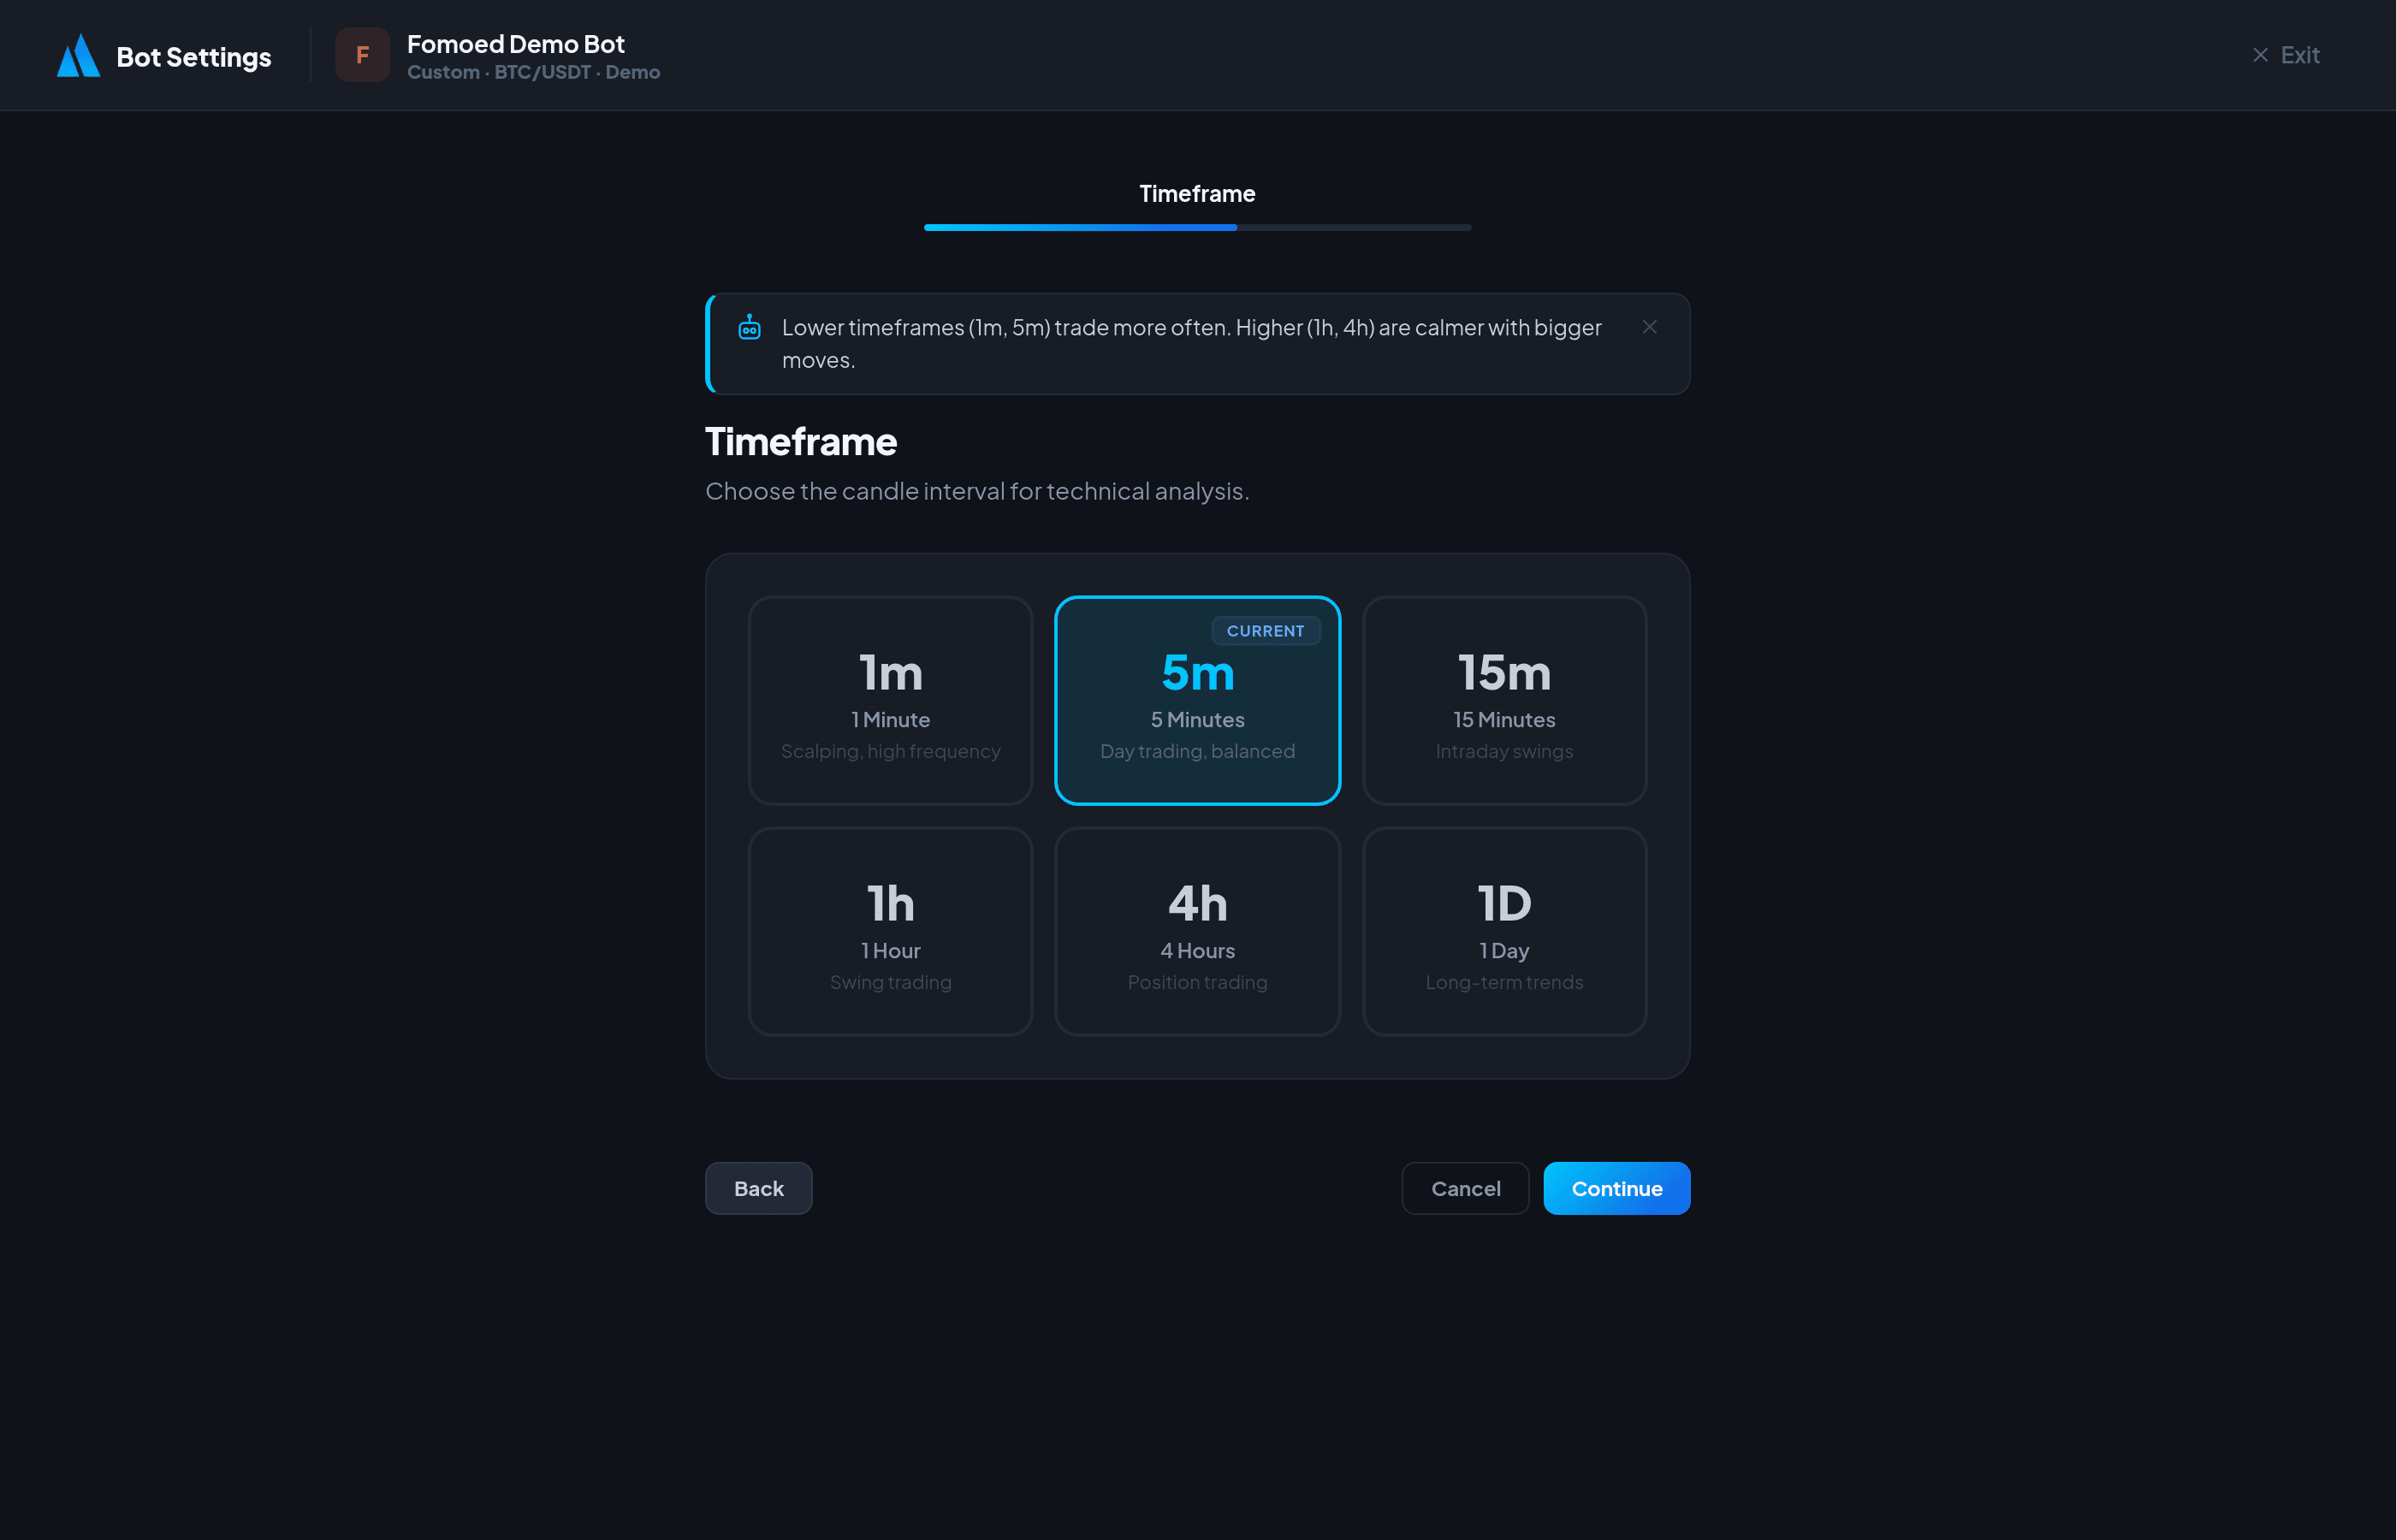
- Timeframe — 1m, 5m, 15m, 1h, 4h, or 1d candles.
- Strategy Settings — Fine-tune your strategy parameters.
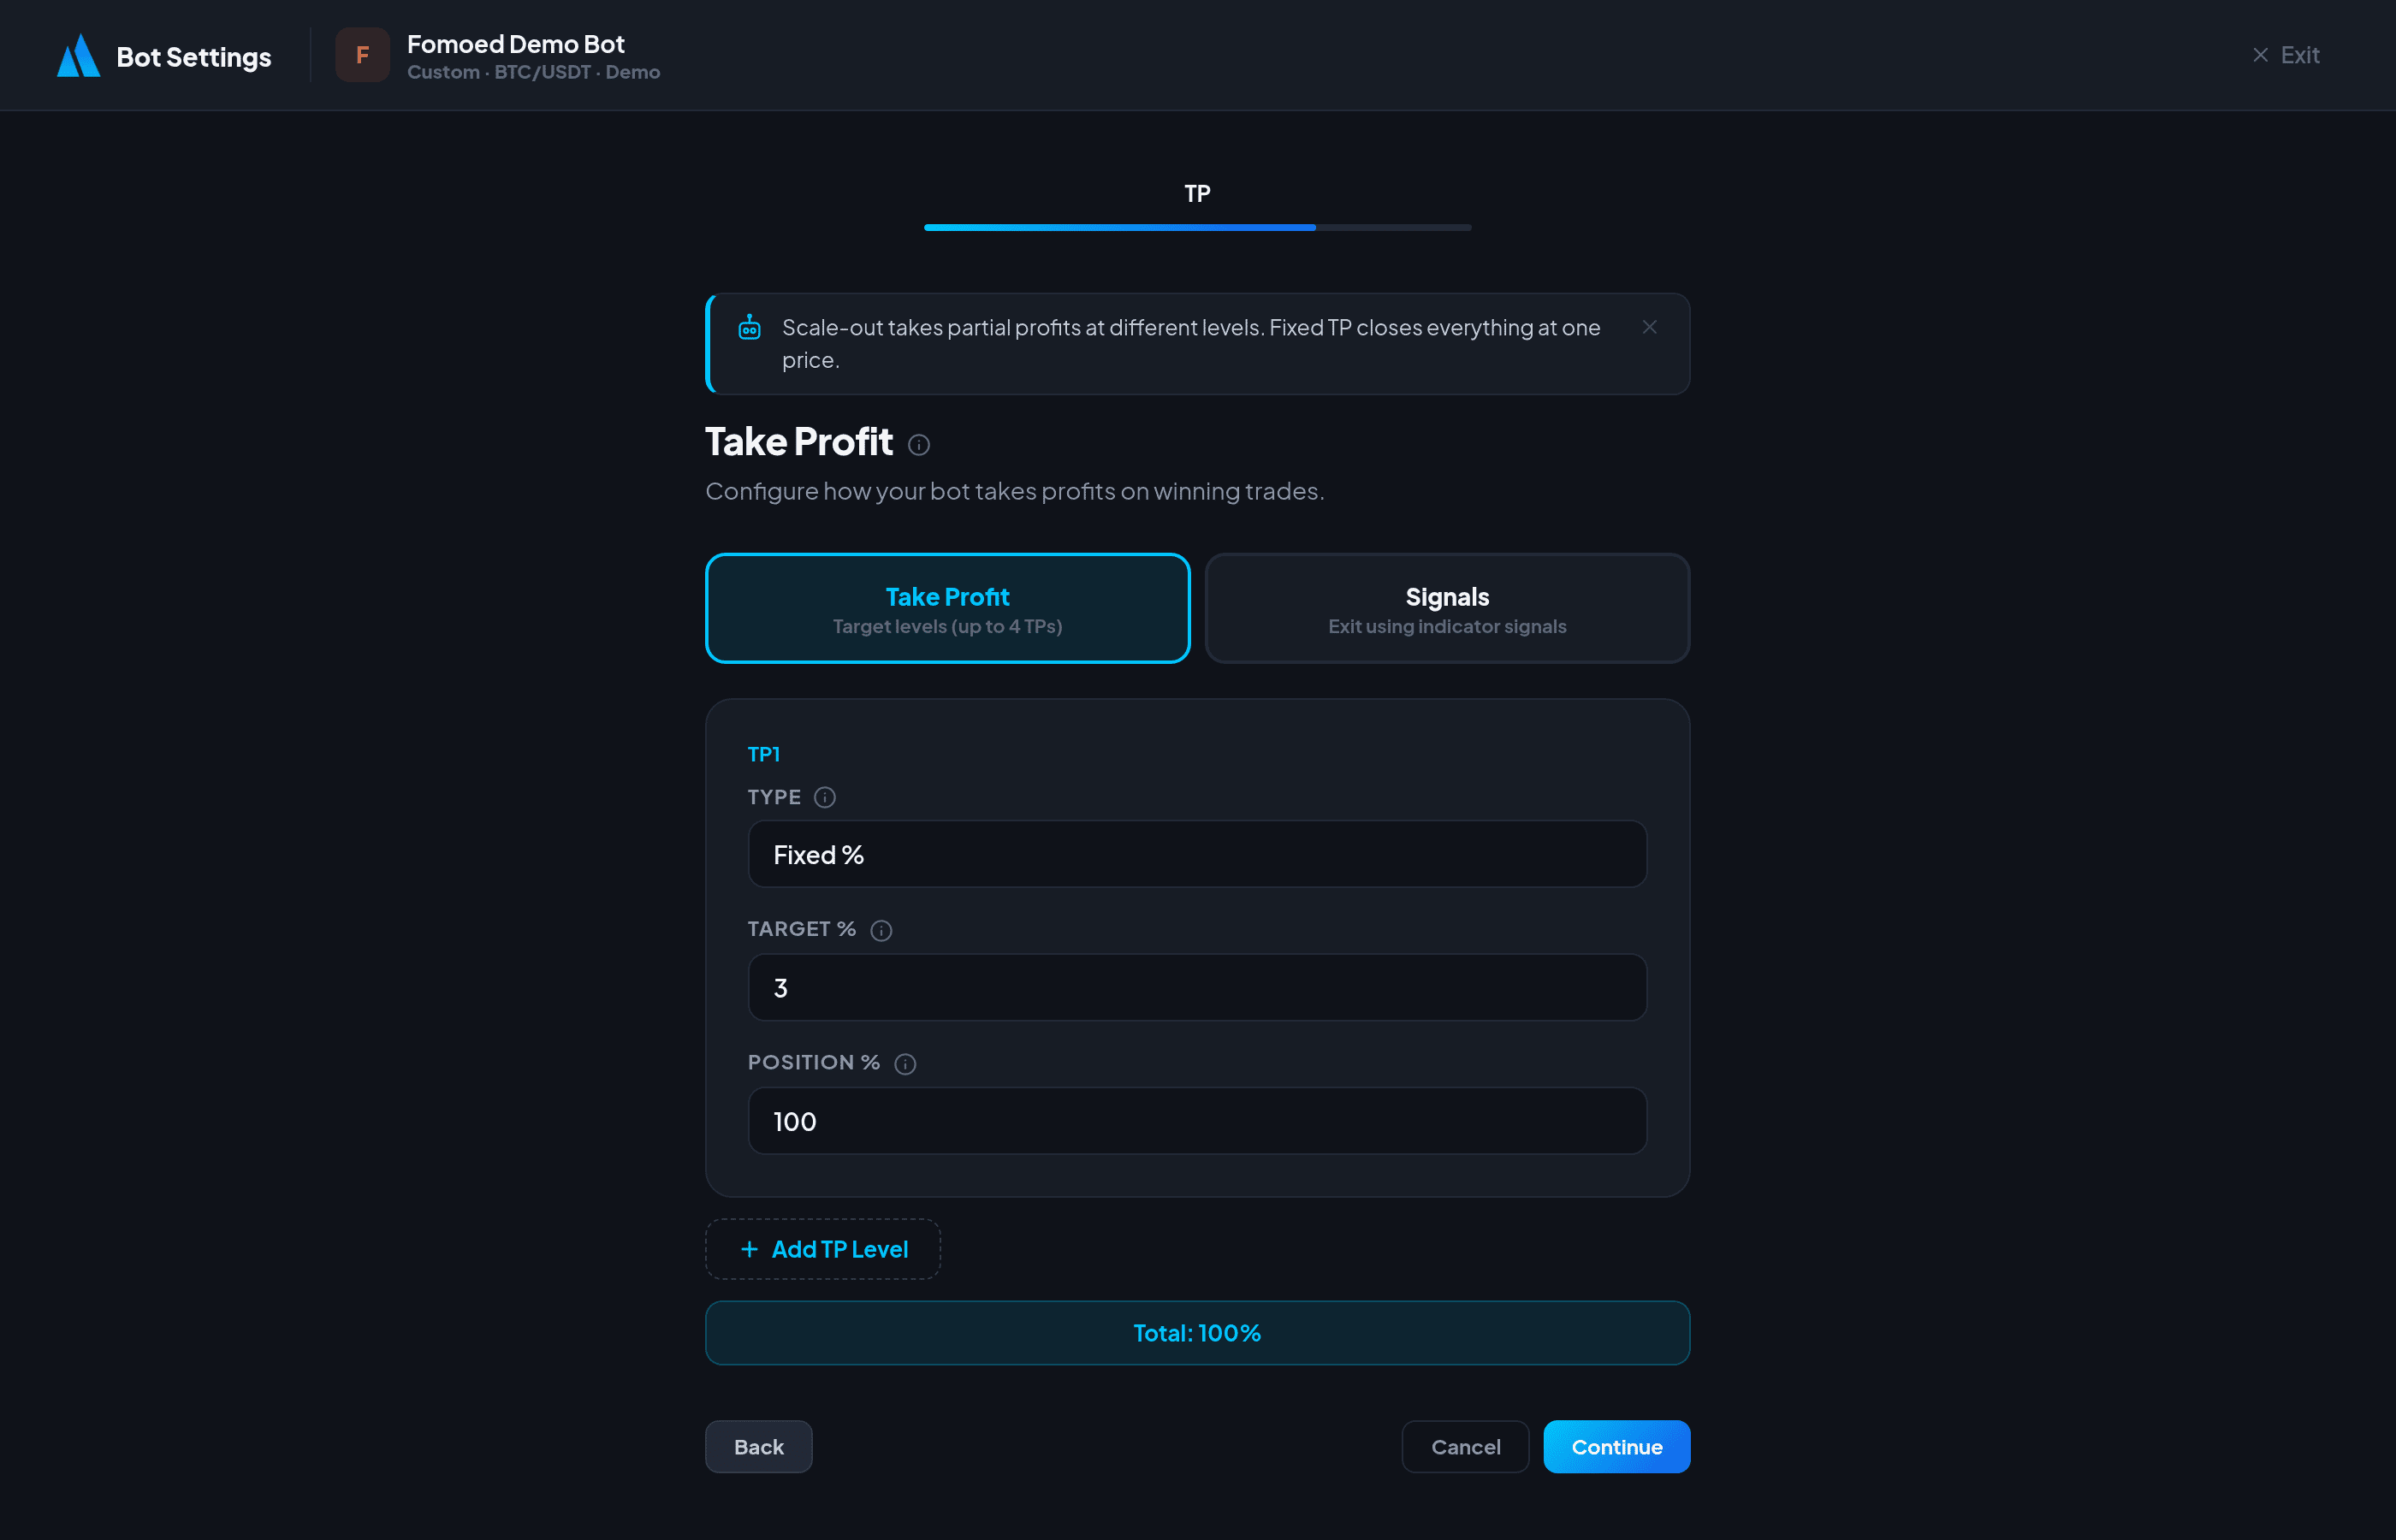
- Take Profit — Set scale-out targets or a fixed TP percentage.
- Stop Loss — Set SL percentage, trailing stop, and breakeven options.
- Notifications — Connect Telegram for real-time trade alerts.
- Review — Confirm all settings before starting.
Step 4: Start Your Bot
- Review your settings on the final step and click "Start Bot".
- Your bot is now running 24/7 in the cloud.
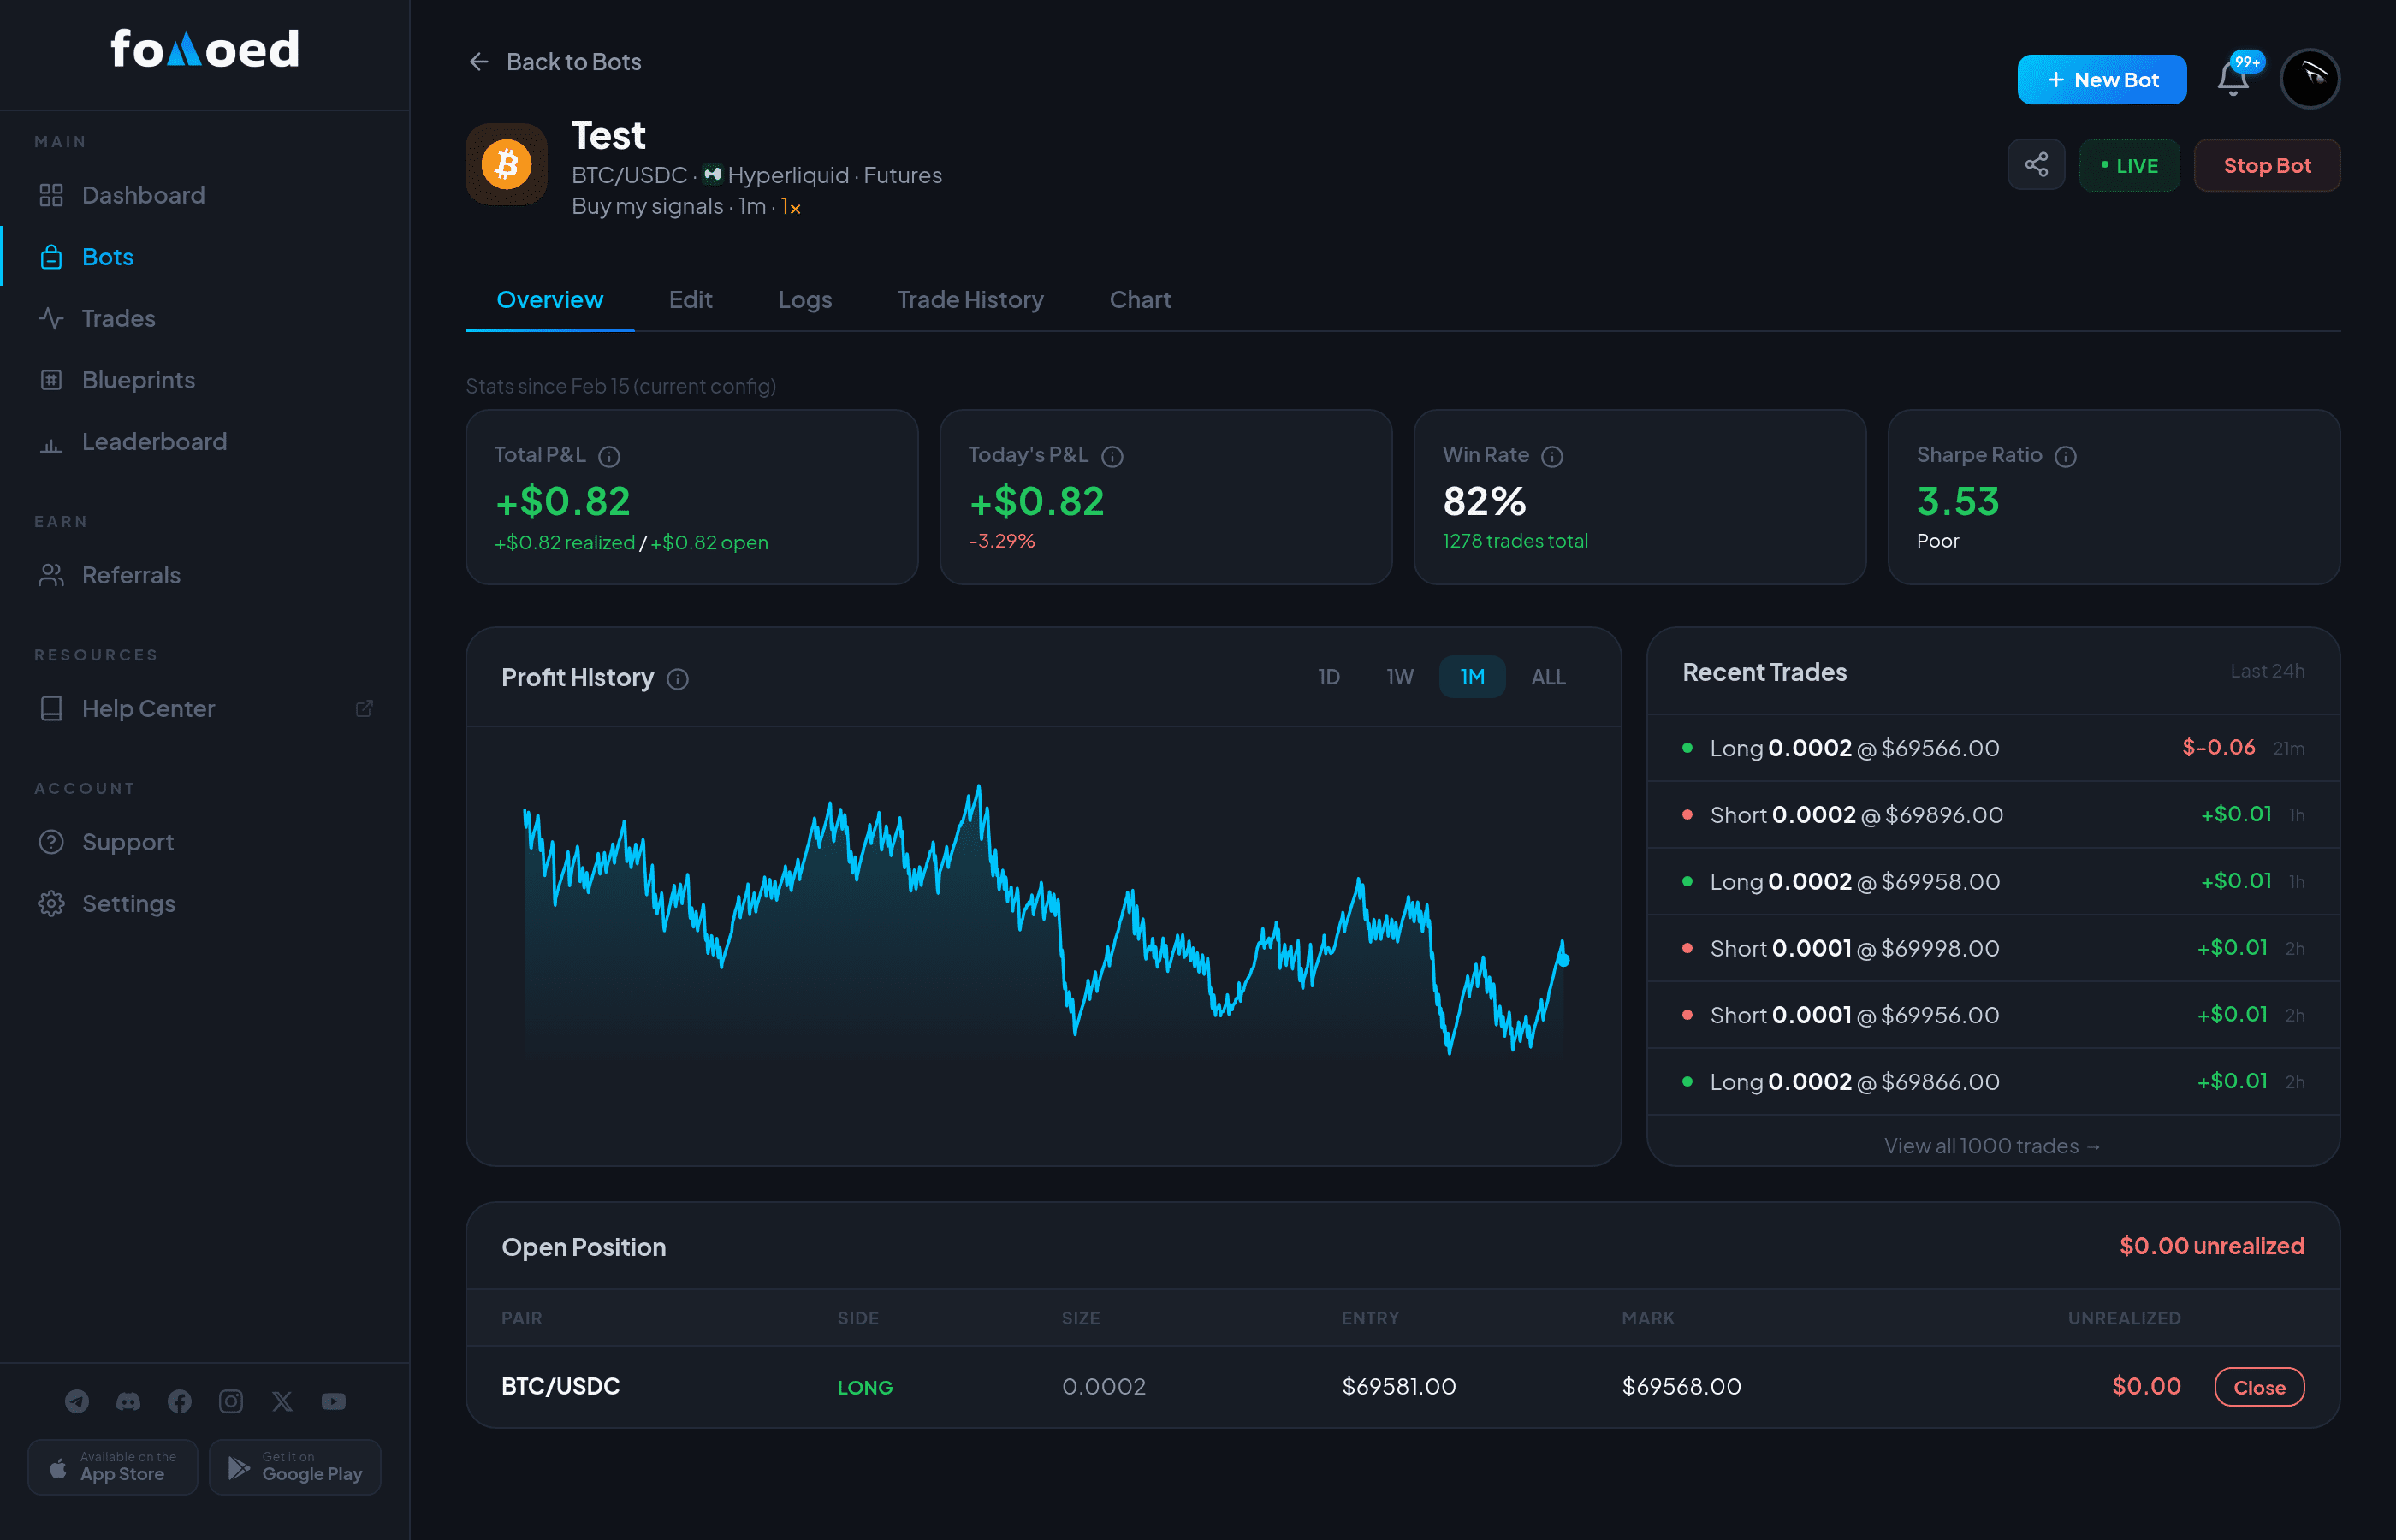
- Monitor performance from the bot detail page
— you'll see open positions, trade history, and P&L in real time.
Important: Always start with a small position size to test your strategy before scaling up.
Did this answer your question?